
The Team Application registration type is ideal for invite-only tournaments and events where teams must be approved before participating.
Before You Begin
To enable the Team Application registration type, your event must meet the following requirements:
- Have a connected Stripe account configured to collect registration fees.
- Have both Athlete and Coach ZortsIDs enabled.
Note: Once these requirements are met, the Team Application option will become available in the Registration Type dropdown menu.
Table of Contents
- Enable Team Application Registration
- Review and Process Team Applications
- Manage Accepted Applications
- Manage Rejected Applications
- View Completed Team Registrations
1. Enable Team Application Registration
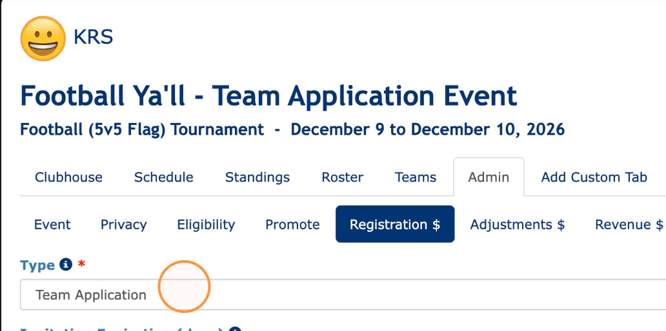
1. Once the required settings are enabled, navigate to the Admin > Registration tabs within your event and select Team Application as your registration type
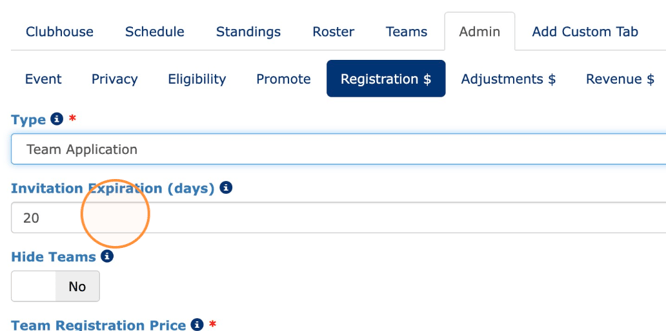
2. Enter the number of days (1–365) Club Admins will have to complete registration and submit payment after their application is accepted.
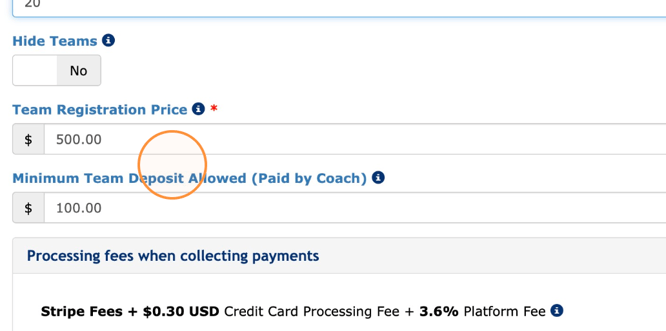
3. Enter your desired Registration Price and Deposit Price.
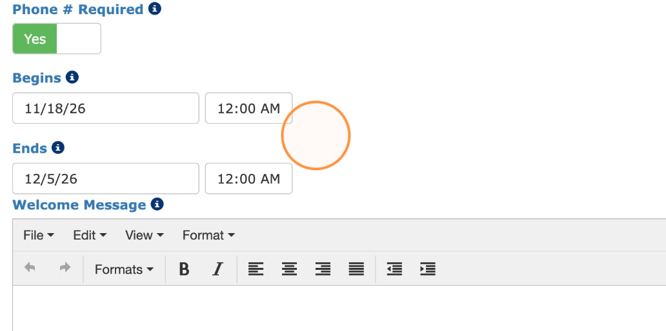
4. Set your desired registration Start Date/Time and End Date/Time.
5. Click Update to save your settings.
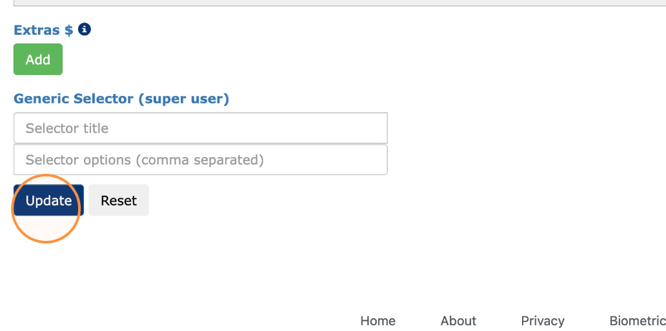
Your event is now configured to accept team applications!
2. Review and Process Team Applications
Once Club Admins begin submitting applications, you can review and process them directly from your event.
1. Log in to your Zorts account and select your Organization.
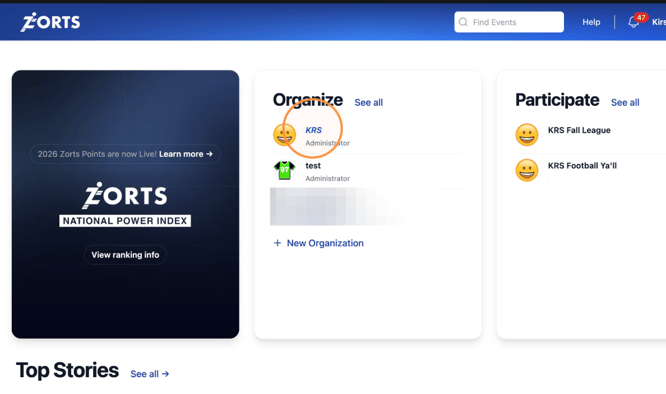
2. Select the event you'd like to manage.
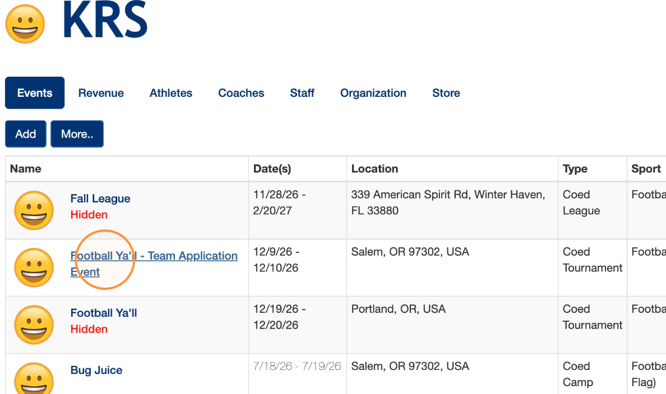
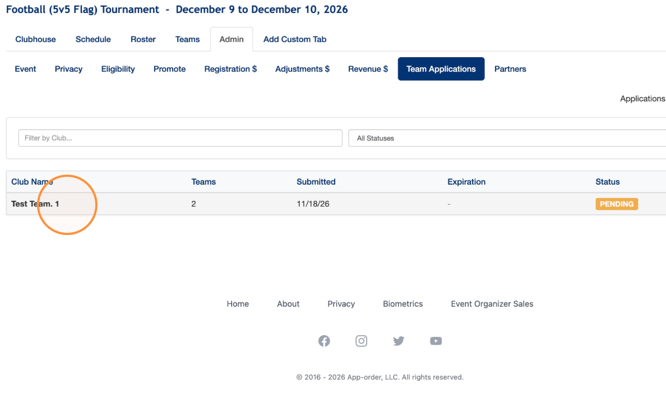
3. Navigate to the Admin > Team Applications tabs.
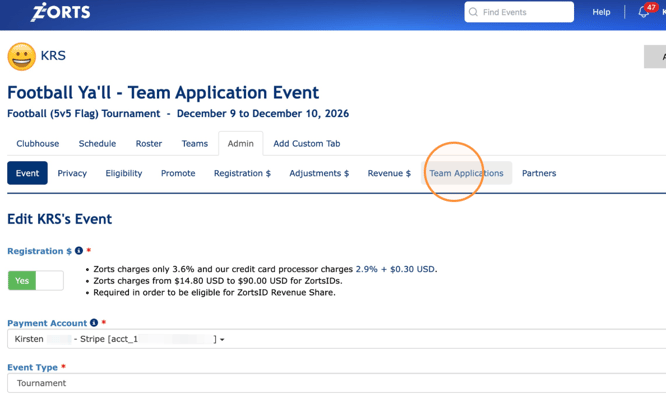
4. Select a Pending application to open and review its details.
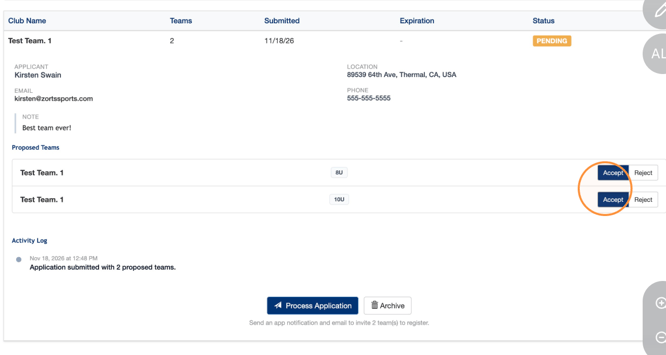
5. Review the application information and use the toggle next to each division to select Accept or Reject.
Note: Each division can be accepted or rejected individually, allowing you to approve a team for certain divisions while declining others.
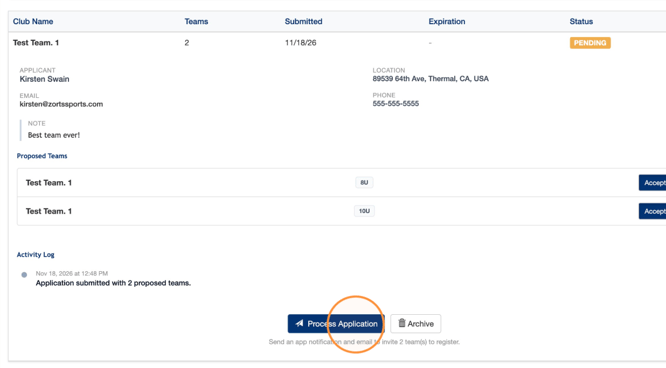
6. Once you've made your selections, click Process Application.
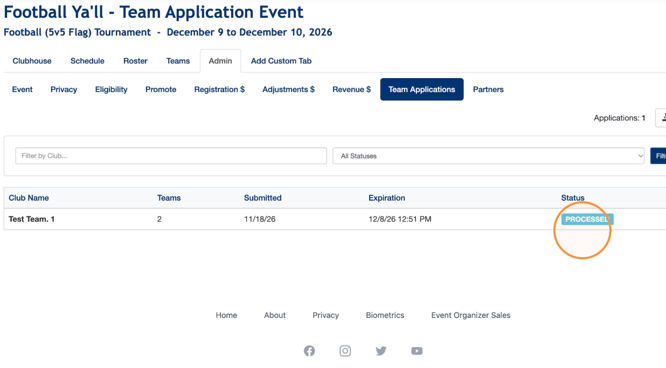
7. The application's status will now display as Processed.
What Happens After an Application Is Accepted?
Once an application is accepted, the Club Admin will receive an invitation to complete registration for the approved division(s).
The Club Admin must complete registration and submit the required payment within the number of days you specified when configuring Team Application registration.
Important: If registration and payment are not completed within that timeframe, the invitation will expire.
3. Manage Accepted Applications
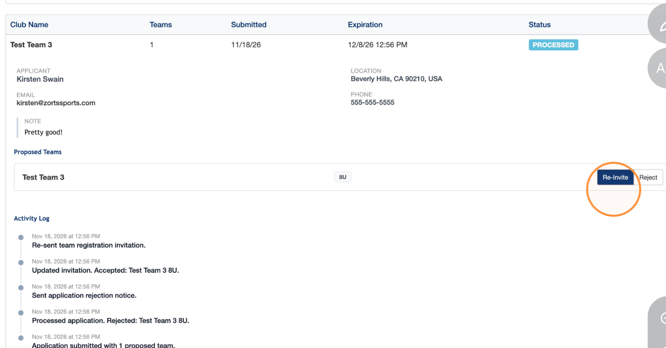
After accepting an application, but before the team completes registration, you can reopen the application to manage its status.
You'll see the following options:
- Re-invite: Send another registration invitation to the Club Admin.
- Reject: Change the application's status to rejected.
4. Manage Rejected Applications
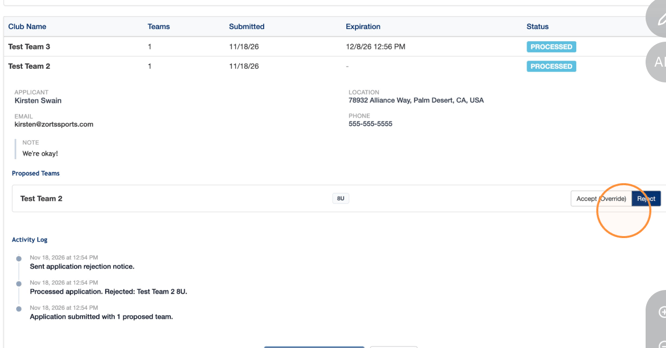
If you've rejected an application, you can still change your decision.
Simply reopen the rejected application and select Accept to override the previous rejection.
5. View Completed Team Registrations
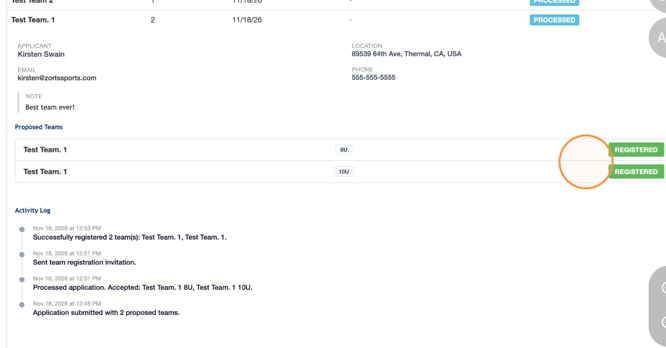
Once a Club Admin has accepted their invitation, completed registration, and submitted the required payment, the application will reflect the team's updated registration status.
To confirm registration, reopen the application under Admin > Team Applications.
Each successfully registered division will now display a Registered status.
Need Additional Assistance?
If you have any questions or need additional assistance, please contact Zorts Support or email us at adminhelp@zortssports.com. We're happy to help!